How to Create Your First REST API with NestJS and Node.js

When building prototypes or sample applications, frontend developers often need real server data. Mock servers like json-server or free mock APIs work for trivial demos. However, they quickly fall short when you need custom business logic, file processing, or custom POST endpoints.
How can a frontend developer build a robust, production-ready backend in Node.js without wrestling with unstructured Express code?
My favorite solution is NestJS. Because NestJS uses TypeScript, modules, controllers, and dependency injection, the mental model is clean, structured, and familiar.
In this guide, I will show you how to build a NestJS REST API from scratch, handle dynamic route parameters, process POST payloads, configure CORS, and consume the API in modern Angular.
1. Why NestJS for Node.js Applications?
Node.js gives you freedom, but in plain Express projects, that freedom often leads to messy code without architectural consistency.
NestJS solves this problem by providing a modular architecture out of the box:
- Controllers: Handle incoming HTTP requests and return responses.
- Providers / Services: Encapsulate business logic, database queries, and third-party integrations.
- Modules: Group related controllers and services into clean domain boundaries.
- Pipes & Guards: Validate incoming request bodies and protect private endpoints.
Let us start by generating our project.
2. Generating the NestJS Project
First, make sure you have Node.js (v18 or higher) installed. Then install the official NestJS CLI:
npm install -g @nestjs/cliTip: You can also use
npx @nestjs/cli new jumbo_apiif you do not want to install global packages on your machine.
Now generate a new project named jumbo_api:
nest new jumbo_api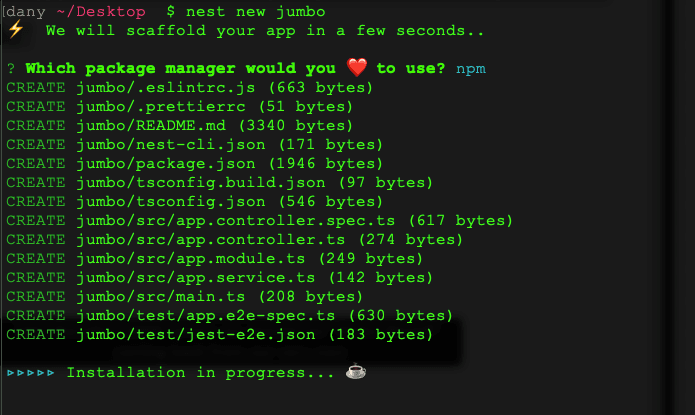
Once the generator finishes, navigate into the project folder and start the development server:
cd jumbo_api
npm run start:dev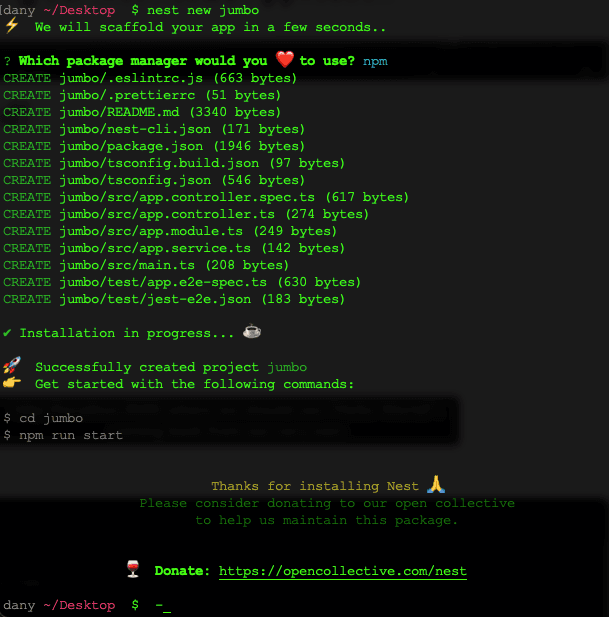
Open http://localhost:3000 in your browser. You will see the default "Hello World!" response.
The start:dev command runs the application in watch mode, automatically recompiling whenever you save changes.
3. Understanding the Core Project Structure
Open the generated project in your editor. You will see four primary files inside src/:
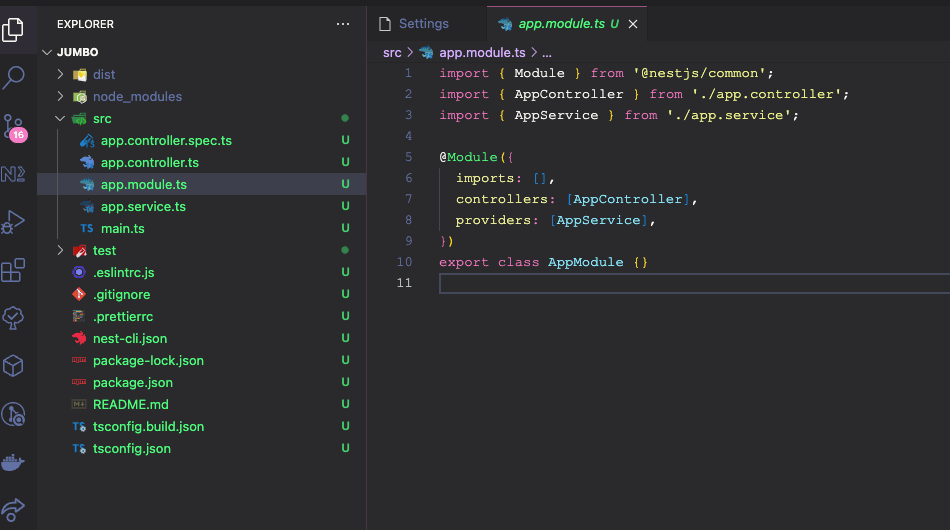
main.ts: The entry point that boots the application usingNestFactory.create():
import { NestFactory } from '@nestjs/core';
import { AppModule } from './app.module';

async function bootstrap() {
  const app = await NestFactory.create(AppModule);
  await app.listen(3000);
}
bootstrap();app.module.ts: The root module where controllers and providers are registered:
import { Module } from '@nestjs/common';
import { AppController } from './app.controller';
import { AppService } from './app.service';

@Module({
  imports: [],
  controllers: [AppController],
  providers: [AppService],
})
export class AppModule {}app.controller.ts: Maps HTTP routes to methods:
import { Controller, Get } from '@nestjs/common';
import { AppService } from './app.service';

@Controller()
export class AppController {
  constructor(private readonly appService: AppService) {}

  @Get()
  getHello(): string {
    return this.appService.getHello();
  }
}
Now let us create our own custom feature controller.
4. Creating a Feature Controller with GET Endpoints
We will create a cards controller to manage membership cards. Run the Nest CLI generator:
nest generate controller cardsThis command creates src/cards/cards.controller.ts and automatically imports it into AppModule.
Returning a List of Objects
Open src/cards/cards.controller.ts and add a getAll method:
import { Controller, Get } from '@nestjs/common';

export interface Card {
  id: number;
  code: string;
  validDate: string;
}

@Controller('cards')
export class CardsController {
  @Get('list')
  getAll(): Card[] {
    return [
      {
        id: 1,
        code: 'CARD-1001',
        validDate: new Date().toLocaleDateString('en-US'),
      },
      {
        id: 2,
        code: 'CARD-1002',
        validDate: new Date().toLocaleDateString('en-US'),
      },
    ];
  }
}
Because the controller has @Controller('cards') and the method has @Get('list'), navigating to http://localhost:3000/cards/list returns the JSON array:
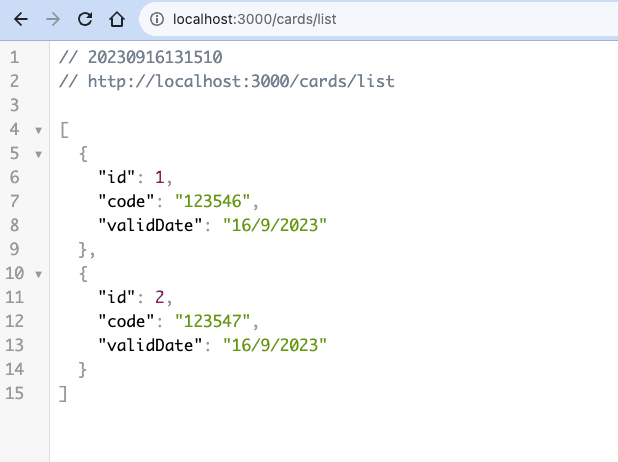
Nest automatically serializes JavaScript arrays and objects into JSON and sets Content-Type: application/json.
5. Reading Dynamic Route Parameters
What if we want an endpoint like /cards/generate/:name that reads a parameter from the URL path?
We use the @Param('name') decorator:
import { Controller, Get, Param } from '@nestjs/common';

@Controller('cards')
export class CardsController {
  @Get('generate/:name')
  generateCard(@Param('name') name: string) {
    return {
      id: Math.floor(Math.random() * 1000),
      code: `CARD-${Math.random().toString(36).substring(2, 7).toUpperCase()}`,
      validDate: new Date().toLocaleDateString('en-US'),
      holder: name,
    };
  }
}
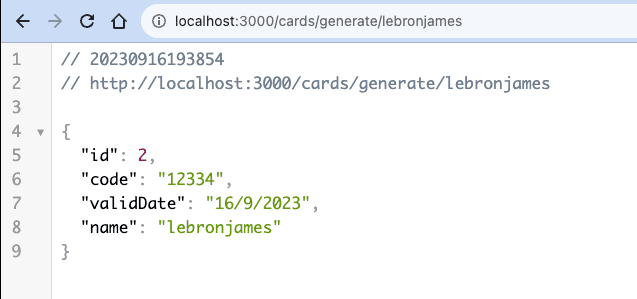
When you open http://localhost:3000/cards/generate/lebronjames, Nest extracts lebronjames from the URL and passes it directly to your method:
Now let us handle incoming POST payloads.
6. Handling POST Requests and Request Bodies
To accept incoming JSON payloads in a POST request, use @Post() and @Body():
import { Controller, Post, Body, HttpCode, HttpStatus } from '@nestjs/common';

export interface SubscribeDto {
  name: string;
}

@Controller('cards')
export class CardsController {
  @Post('subscribe')
  @HttpCode(HttpStatus.OK)
  subscribe(@Body() body: SubscribeDto) {
    return {
      id: Math.floor(Math.random() * 10000),
      name: body.name,
      active: true,
      createdAt: new Date().toISOString(),
    };
  }
}
Notice the @HttpCode(HttpStatus.OK) decorator. By default, Nest returns HTTP status 201 Created for POST requests. Adding @HttpCode(HttpStatus.OK) changes the status code to 200 OK when appropriate.
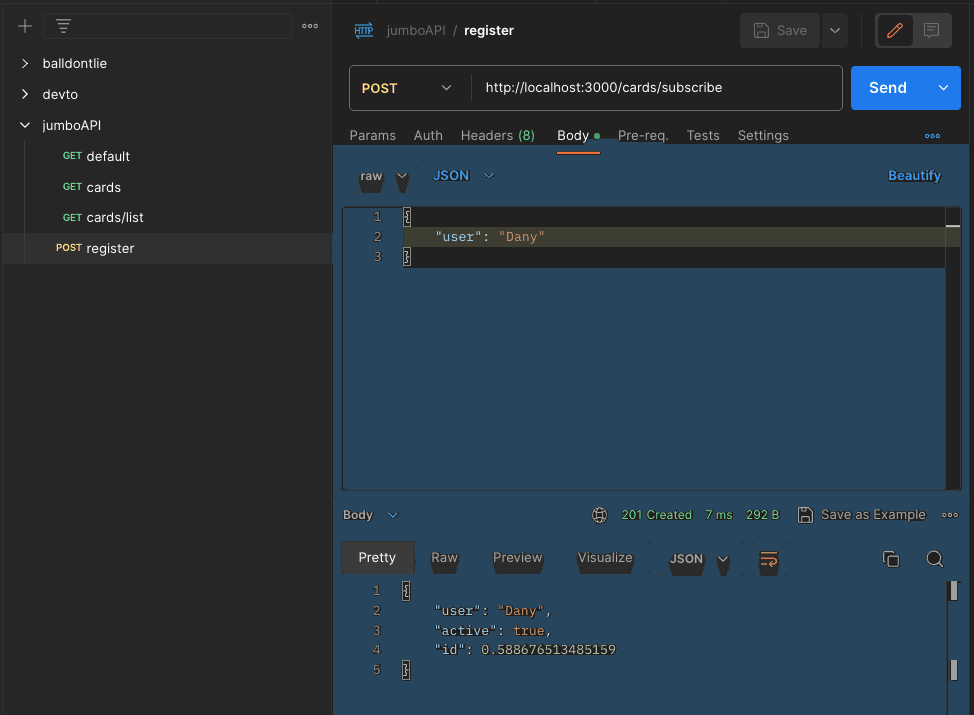
Send a POST request with Postman or curl:
curl -X POST http://localhost:3000/cards/subscribe \
  -H "Content-Type: application/json" \
  -d '{"name": "Dany Walls"}'
The server responds with our structured JSON object:
Before we connect our frontend, there is one critical step: enabling CORS.
7. Enabling CORS in NestJS
If your frontend runs on http://localhost:4200 and your API runs on http://localhost:3000, the browser blocks requests due to the Same-Origin Policy.
In NestJS, enabling Cross-Origin Resource Sharing takes one line. Open src/main.ts:
import { NestFactory } from '@nestjs/core';
import { AppModule } from './app.module';

async function bootstrap() {
  const app = await NestFactory.create(AppModule);

  // Enable CORS for frontend clients
  app.enableCors();

  await app.listen(3000);
}
bootstrap();
You can also pass options to app.enableCors({ origin: 'http://localhost:4200' }) to restrict access in production.
Now let us consume the API in Angular.
8. Consuming the API in Modern Angular
Create an Angular standalone application:
npx @angular/cli new jumbo_web --standalone --routing=false --style=scssConfiguring HttpClient in app.config.ts
In modern Angular, configure provideHttpClient() in src/app/app.config.ts:
import { ApplicationConfig, provideZoneChangeDetection } from '@angular/core';
import { provideHttpClient } from '@angular/common/http';

export const appConfig: ApplicationConfig = {
  providers: [
    provideZoneChangeDetection({ eventCoalescing: true }),
    provideHttpClient(),
  ],
};
Creating the Card Service with Signals
Create a service to interact with the NestJS API:
// src/app/cards.service.ts
import { Injectable, inject, signal } from '@angular/core';
import { HttpClient } from '@angular/common/http';
import { toSignal } from '@angular/core/rxjs-interop';

export interface Card {
  id: number;
  code: string;
  validDate: string;
}

@Injectable({ providedIn: 'root' })
export class CardsService {
  #http = inject(HttpClient);
  #apiUrl = 'http://localhost:3000/cards';

  // Automatically converts Observable to a reactive Signal
  cards = toSignal(this.#http.get<Card[]>(`${this.#apiUrl}/list`), { initialValue: [] });
  activeCard = signal<Card | null>(null);

  generate(name: string) {
    this.#http.post<Card>(`${this.#apiUrl}/subscribe`, { name })
      .subscribe((card) => {
        this.activeCard.set(card);
      });
  }
}
Displaying the Data with Modern Control Flow (@if and @for)
In src/app/app.component.ts:
import { Component, inject } from '@angular/core';
import { CardsService } from './cards.service';

@Component({
  selector: 'app-root',
  standalone: true,
  template: `
    <main class="container">
      <h1>Membership Cards</h1>

      <div class="form-group">
        <label for="name">Your Name:</label>
        <input id="name" #nameInput placeholder="Enter your name" />
        <button (click)="createCard(nameInput.value)">Generate Card</button>
      </div>

      @if (cardsService.activeCard(); as card) {
        <div class="alert-success">
          <p>Card generated for: <strong>{{ card.name }}</strong> (ID: {{ card.id }})</p>
        </div>
      }

      <h2>Available Cards</h2>
      <div class="cards-grid">
        @for (item of cardsService.cards(); track item.id) {
          <div class="card">
            <span>Code: {{ item.code }}</span>
            <span>Valid Until: {{ item.validDate }}</span>
          </div>
        } @empty {
          <p>No cards found.</p>
        }
      </div>
    </main>
  `,
})
export class AppComponent {
  cardsService = inject(CardsService);

  createCard(name: string) {
    if (name.trim()) {
      this.cardsService.generate(name);
    }
  }
}
Note for Legacy Angular (v16 and earlier): You can use
*ngIf="cardsService.activeCard()"and*ngFor="let item of cardsService.cards()"by importingCommonModule. Modern Angular (v17+) uses the@ifand@forcontrol flow syntax shown above.
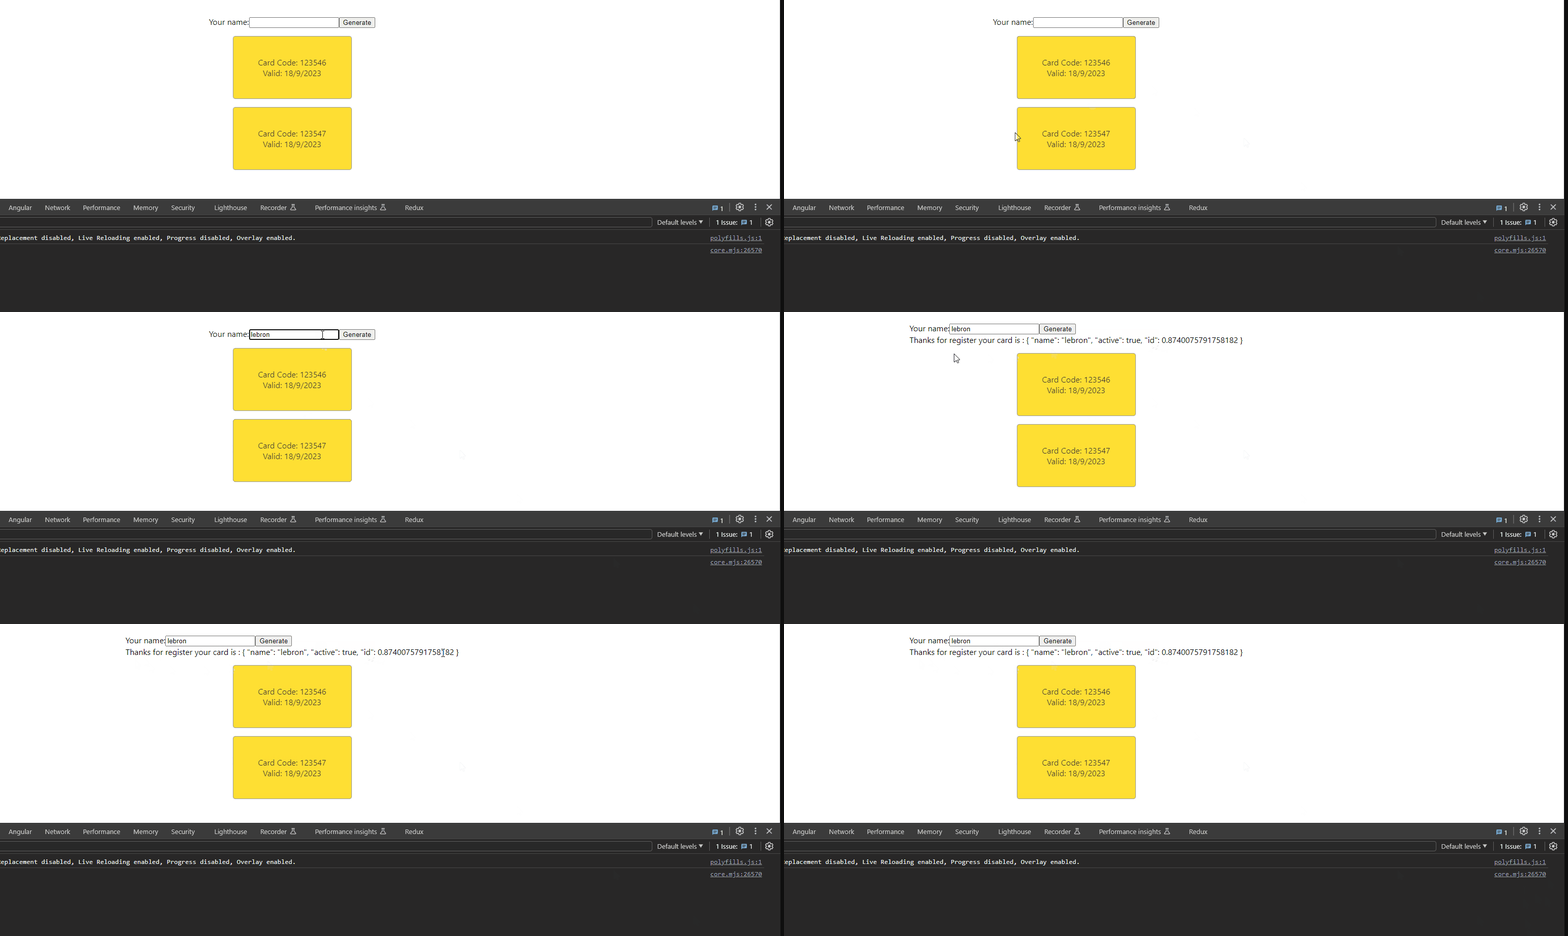
Run npm start in your Angular project, open http://localhost:4200, and you have a connected full-stack application!
9. Containerizing the API with Docker
To deploy the NestJS API consistently across cloud environments, create a Dockerfile inside jumbo_api/:
# Multi-stage production build
FROM node:22-alpine AS build

WORKDIR /usr/src/app

COPY package*.json ./
RUN npm ci

COPY . .
RUN npm run build

# Production runtime stage
FROM node:22-alpine AS runner

WORKDIR /usr/src/app
ENV NODE_ENV=production

COPY package*.json ./
RUN npm ci --omit=dev

COPY --from=build /usr/src/app/dist ./dist

EXPOSE 3000
CMD ["node", "dist/main.js"]
Build and test your container image:
docker build -t jumbo-api:latest .
docker run -p 3000:3000 jumbo-api:latest
Your API is now packaged as an isolated, lightweight container ready for Google Cloud Run, AWS ECS, or any container runtime.
Conclusion & Next Steps
Building Node.js APIs with NestJS gives you structure without sacrificing developer velocity:
- Leverage modularity: Use controllers for HTTP routing and services for business logic.
- Use strict types: Define DTOs (Data Transfer Objects) and interfaces to share contracts between frontend and backend.
- Turn on CORS early: Avoid frustrating browser errors by configuring
app.enableCors()during setup.
If you want to continue expanding your backend and cloud skills, check out these related guides:
Explore more in-depth guides and real-world architectures in the Cloud series.
Frequently Asked Questions
What is NestJS and why use it with Node.js?
NestJS is a progressive Node.js framework built with TypeScript. It provides a modular architecture with controllers, services, and dependency injection, making backend development structured and maintainable.
How do I install the NestJS CLI?
You can install the official NestJS CLI globally using npm i -g @nestjs/cli, or run commands directly without global installation using npx @nestjs/cli new project-name.
How do I enable CORS in NestJS?
Call app.enableCors() on your Nest application instance in main.ts before calling app.listen(port).
How do I consume a NestJS API in modern Angular?
Use provideHttpClient() in your app.config.ts, inject HttpClient using the inject() function, and convert observables to signals using toSignal().
Related Articles
Moving from Vercel Next.js to Google Cloud Run: A Cost and Architecture Guide
Why I migrated my Next.js projects from Vercel to Google Cloud Run, how the standalone Docker build works, and how to stay on the free tier.
How to Detect and Fix Circular Dependencies in TypeScript
Learn why circular dependencies break TypeScript applications at runtime, how to detect them using Madge and ESLint, and how to fix them using type-only imports and clean architectural patterns.
How to Check Types in TypeScript (The Complete Guide)
Learn how to check and validate types in TypeScript at compile-time and runtime using typeof, instanceof, the in operator, discriminated unions, custom type guards, and Zod or Valibot.
Managing HTTP Errors in NestJS Effortlessly
When we develop applications, errors can also occur in the API, such as when we request data and it doesn't exist or the database is unavailable. How can we catch and handle errors in the API? For instance, in the Jumbo API, we the cards.service find...
Share this article
If you found this guide helpful, consider sharing it with your team or fellow developers.
Real Software. Real Lessons.
I share the lessons I learned the hard way, so you can either avoid them or be ready when they happen.
Join 13,800+ developers and readers.
No spam ever. Unsubscribe at any time.