Why I Switched from Loom to Cap
For years, Loom was my go-to tool for screen recordings. Whether I was explaining a bug to my team, creating quick tutorials, or sharing feedback on a pull request, Loom made it easy. But recently, I found myself looking for something better.
What problem does this solve? We need tools that are fast, reliable, and don't break the bank. We also value tools that respect our privacy and give us control over our data.
After trying Cap.so, I made the switch. Let me tell you why.
What is Cap?
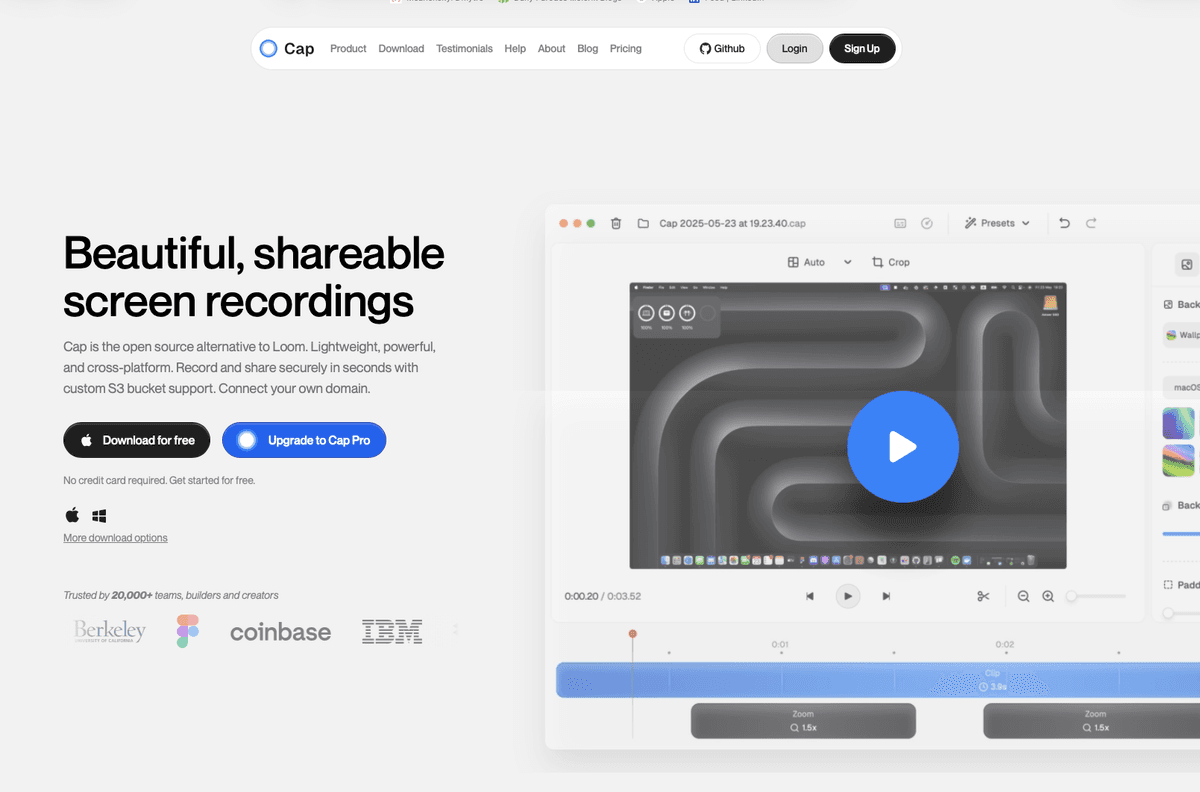
Think of Cap as the open-source alternative to Loom. It's lightweight, powerful, and works across platforms. But what makes it special isn't just that it's open source—it's how it fits into a developer's workflow.
Cap gives you two modes that fit different workflows. When I need something quick, I use Instant Mode—just record, stop, and share. Your video is live in seconds with auto-generated captions and summaries. But when I need that extra polish for a client presentation or a tutorial, Studio Mode gives me full editing capabilities to make everything perfect.
Why I Made the Switch
1. Screenshots and Screen Recording in One Tool
One thing that immediately caught my attention was Cap's ability to handle both screenshots and screen recordings. We often need to quickly capture what's on our screen—sometimes a static image is enough, sometimes we need a video.
Before Cap, I was juggling multiple tools. I used Gifox for quick GIF captures and Shottr for screenshots with annotations. Both are great tools, but switching between them broke my flow. With Cap, I don't need to switch between different tools anymore—everything is in one place.
Screenshot Mode isn't just a basic grabber. It includes a dedicated editor that I use all the time. I can add shapes and text annotations to highlight what matters, apply sensitive masking when I need to hide API keys or passwords, adjust backgrounds and padding to make screenshots look professional, and then export or share everything with a single click.
I can take a screenshot when I need to show a quick UI state, or record a video when I need to explain a complex flow. This might seem small, but it saves me time throughout the day.
2. Easy Sharing That Just Works
Sharing videos should be simple. With Cap, you get shareable links that work instantly. What I love is that the tool automatically generates captions, titles, summaries, and even chapters for longer videos. This means when I share a recording with my team, they can quickly understand what it's about without watching the entire video. For async collaboration, this is a game-changer.
Another feature I absolutely love is the auto-zoom cursor. When you're recording tutorials or demos, Cap automatically zooms in on your cursor when you click, making it crystal clear what you're doing. This is perfect for creating professional-looking tutorials without any post-production work. Here's a quick demo I recorded:
3. The Price That Makes Sense
Here's the deal: Loom Business costs $12.50/user/month. Cap's Desktop License? $29/year or $58 lifetime. You do the math.
Cap has three tiers: Free (unlimited local recording, 5-min shareable links), Desktop License ($29/year for commercial use), and Cap Pro ($8.16/month for unlimited sharing and AI features). For solo developers, the lifetime license is a no-brainer. For teams, Cap Pro is still way cheaper than Loom.
Real-World Use Cases
I use Cap daily for bug reports (show, don't tell), code reviews (walk through changes with auto-generated summaries), quick tutorials for new team members, and client demos. The auto-zoom cursor and captions make everything look professional without any editing.
What About the Free Version?
The free version of Cap is quite generous. You get unlimited local recordings, shareable links up to 5 minutes, export to MP4 or GIF, and even Studio Mode with the full editor. For many developers, this is enough. I used the free version for weeks before upgrading. You only need to upgrade if you need unlimited cloud storage, longer shareable links, AI features like auto titles and transcriptions, custom domain support, or team spaces.
My Recommendation
If you're looking for a screen recording tool, give Cap a try. The free version is generous enough to test it out, and the Desktop License at $29/year is incredible value. For teams needing AI features and unlimited sharing, Cap Pro at $8.16/month per user is significantly cheaper than Loom.
The only reason to stick with Loom? If your entire team is already locked in and migration feels too painful. Otherwise, download Cap using my referral link and see the difference for yourself.
Try It Yourself
Ready to make the switch? Here's what to do:
- Download Cap: Visit cap.so and download for your platform
- Try the free version: Record a few videos and see how it feels
- Compare with your current tool: Use both for a week and see which fits your workflow better
- Upgrade if needed: If you like it, the Desktop License is a no-brainer at $29/year
Final Thoughts
After years of using Loom, switching to Cap was one of the best decisions I made. Screenshots and screen recording in one tool, incredible pricing, and the freedom to own my data—it just works.
Give Cap a try and let me know what you think. I'm curious to hear if it fits your workflow as well as it fits mine.
Related Articles
Real Software. Real Lessons.
I share the lessons I learned the hard way, so you can either avoid them or be ready when they happen.
Join 13,800+ developers and readers.
No spam ever. Unsubscribe at any time.