Testing Functional Guards in Angular 15: A Step-by-Step Guide

Since Angular 14, we can convert our class guards to functional and also combine them with inject making it so easy to write guards Angular applications.
When we move from class to functional, the constructor disappears, and the dependencies come from inject, but how much is the testing impacted?
Functional Guard
In a prior blog post about functional guards, we explored the shift from class-based to functional guards in Angular applications.
We have a functional guard, `domainGuard`; it uses the inject function to get two dependencies: the router and the Domain Service.
import {inject} from '@angular/core';
import {Router} from '@angular/router';
import {tap} from 'rxjs';
import {DomainService} from '../domain.service';

export const domainGuard = () => {
    const router = inject(Router);
    const service = inject(DomainService)
    return service.isAvailable().pipe(
    tap((value) => {
      return !value ? router.navigate(['/no-available']) : true
    }
  ))
}
We'll utilize TestBed and a custom function to ensure thorough test coverage. Let's dive in!
Using Testbed
Using Testbed simplifies the process of configuring tests, but remember that we use the inject function to supply our dependencies, and the inject function can be found within the function body only.
But In Angular 15, the runInInjectionContext feature enables us to supply our dependencies previously provided through the inject function.
Read more https://angular.io/api/core/testing/TestBed#runInInjectionContext
Instead of using BeforeEach, I've developed a custom setup function that generates an instance of our guard with TestBed.
The domainGuard relies on two dependencies: router and domainService.
-
Rather than importing the RouterTestingModule, I'll mock the Router using `createSpyObject`.
-
The setup function takes a domainServiceMock parameter, allowing me to tailor the domainService behavior for each test.
-
Retrieve the domainGuard instance by utilizing `TestBed.runInInjectionContext`.
The final code looks like this:
const mockRouter = jasmine.createSpyObj<Router>(['navigate'])
  mockRouter.navigate.and.returnValue(lastValueFrom(of(true)))

  const setup = (domainServiceMock: unknown) => {
    TestBed.configureTestingModule({
      providers: [
        domainGuard,
        { provide: DomainService, useValue: domainServiceMock},
        { provide: Router, useValue: mockRouter}
      ]
    });

    return TestBed.runInInjectionContext(domainGuard);
  }
WAIT JUST A MOMENT!
I know the testing in Angular is scary for many developers, including me. Do you want to understand Angular testing, from the basic to the advanced parts and which are important for real world scenarios ?
Take a look at "Conscious Angular Testing" by Decoded Frontend – now with a special discount!

The course clearly explains things like Testbed, setting up tests, lifecycle hooks, and adding dependencies. It teaches you how to write non-fragile tests, deal with standalone components, content projection, inject testing, services, components with dependencies and more.
After this, I am no longer scared of writing tests in Angular.
Write Tests
We'll be writing two tests, and for each, we'll invoke the setup function to obtain the guard instance. This allows us to tailor the domainService according to our test requirements.
The final code looks like this:
  it('should allow to continue', () => {

    const mockDomainService : unknown = {
      isAvailable: () => of(true)
    }
    const guard = setup(mockDomainService);
    guard.subscribe((p: unknown) => {
      expect(p).toBe(true)
    })
  })

  it('should redirect to /no-available path', () => {

    const mockDomainService: unknown = {
      isAvailable: () => of(false)
    }

    const guard = setup(mockDomainService);
    guard.subscribe((p: unknown) => {
      expect(p).toBe(false)
      expect(mockRouter.navigate).toHaveBeenCalled()
    })
  })
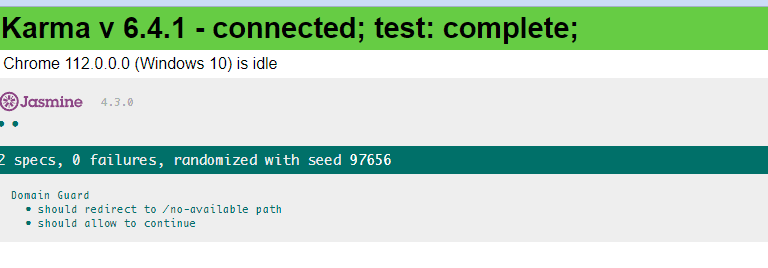
Done! We are testing our functional guard easily!

I highly recommend watching @Rainer Hahnekamp video about Testing Injection
Final
Transforming our class guard into a functional format is remarkably straightforward, and the necessary modifications to our tests are minimal. The key to achieving this lies in the clever utilization of TestBed.runInInjectionContext in conjunction with Testbed, allowing for a seamless transition and enhanced functionality.
If you have questions, concerns, or thoughts, please comment below. For a deeper technical dive, check out the source code on GitHub.
Real Software. Real Lessons.
I share the lessons I learned the hard way, so you can either avoid them or be ready when they happen.
Join 13,800+ developers and readers.
No spam ever. Unsubscribe at any time.